Midterm in Process
 |
| Image 1 |
BLUE PRINTS: I started with the reference photos, which was added to the Top, Front, and Side window.
POLYGON: The polygons cubed was extruded, Move Tool, Manipulator Too such as: to rotated and scaled, from the selected component.
 |
| Image 2 |
Many times Vertex points were also used to make adjustments.
 |
| Image 3 |
Top, Perspective, Front, and Side views.
 |
| Image 4 |
This is the shape starting to form after hours of works. However, I did made the shape based on the blueprints.
 |
| Image 5 |
After many hours of works it look like this pictures in the left.
In order to makes the see through glasses for the jet. I had to deletes some front planes AND add new planes.
 |
| Image 6 |
Now you can see through glasses, which was edited in the transparency.
 |
| Image 7 |
A side view looks.
 |
| Image 8 |
A side-front view looks.
 |
| Image 9 |
Back view looks.
 |
| Image 10 |
Testing which one look best. All the new looks are adjusted by using Extrude tools.
 |
| Image 11 |
Testing which one look best. All the new looks are adjusted by using Extrude tools.
 |
| Image 12 |
Testing which one look best. All the new looks are adjusted by using Extrude tools.
 |
| Image 13 |
Testing which one look best. All the new looks are adjusted by using Extrude tools.
 |
| Image 14 |
Testing which one look best with the color.
 |
| Image 15 |
Different look with color.
 |
| Image 16 |
Different look with red color.
 |
| Image 17 |
Fixing the top due to the air dynamic motion.
 |
| Image 18 |
After fixing the top view looks.
 |
| Image 19 |
Outline of the animation, which was (airplane) to go around the Sun.
 |
| Image 20 |
This how it looks after adding the fire effect on the Sun and air plane's back engine.
 |
| Image 21 |
 |
| Image 22 |
 |
| Image 23 |
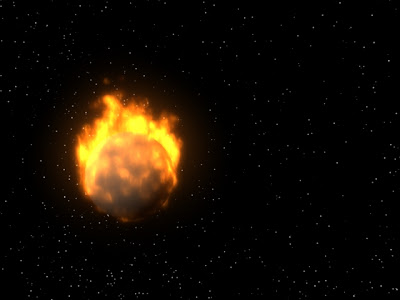
The fiery ball is the Sun and tinny white glowing particle are stars.
A closer look at the Sun.
A different look at the Sun.
 |
| Image 24 |
|
A different view of at the Sun.
 |
| Image 25 |
In the airplane fluid effect was added in a 3D container,.
 |
| Image 26 |
In the Attribute Editor I edited in the Container Properties, Contents Method, Display, Dynamic Simulation, Auto Resize, Grids Cache, Surface, Textures, and finally Node Behaviors. All of the tools were used to make fire on the Jet's engine.
 |
| Image 27 |
In the Attributes Editor menu Color's yellow were used, in Incandescence temperatures were used for the input and finally Opacity were used to mix max the color of the fire.
 |
| Image 28 |
In the sub-menu of the Attribute Editor fluid menu were used to Transform.
 |
| Image 29 |
More testing with the color pattern.
 |
| Image 30 |
Expression Editor were used to code for the Stars, which function was to randomness separation of the stars and there steady glow.
 |
| Image 31 |
 |
| Image 32 |
 |
| Image 33 |
More coding expressions.
The over all view of the universe, where Sun in the middle and an airplane going around it.
 |
| Image 34 |
 |
| Image 35 |


No comments:
Post a Comment